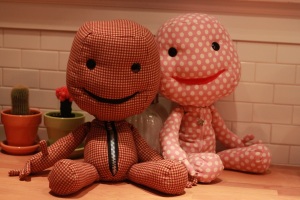
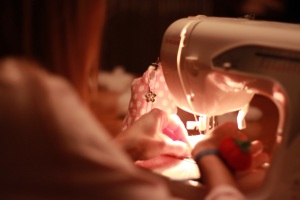
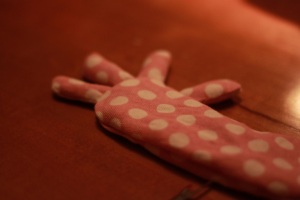
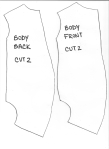
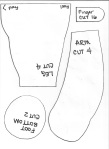
Yes, way off topic, but something fun to share. I made these over the holiday break. The pattern is fairly simple, assuming you’re familiar enough with sewing to own a machine. heh. I’m certainly no master seamstress, as you will soon deduce.
I purchased roughly 2.5 yards of fabric per doll, with lots leftover. Also used: matching thread, 7/8″ buttons for eyes, felt for mouth, embroidery thread for attaching the eyes and pulling in the mouth shape, zipper, small piece of lightweight fabric for the zipper pocket, and a heavy craft needle (blunt tip) to use with the embroidery thread (saves stabbing your fingers).
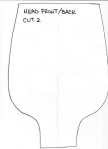
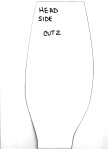
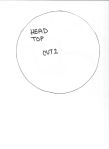
Print/cut all 8.5×11 pages below, pin to your fabric and cut pieces. I washed, dried, and pressed my fabric before starting to make it more pliable.
Assembly!
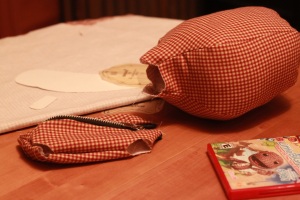
HEAD – Machine stitch the Front/Sides/Back panels together, then pin the Top in place carefully before sewing (a big pain!.. happy to hear circle stitching tips:)
POCKET – Start with the Front body panels. Pin the zipper to the center edge, then add the pocket liner, sandwiching the zipper between the liner and Front panel; Stitch all three layers together; Fold the pocket back and top stitch to keep it from catching in the zipper (trust me).
hmmm, More pictures would help, but I’m lazy. Here’s a great lesson in zippology..
http://www.twelve22.org/2006/07/zipper_tutorial.html
If your zipper is extra short, then you’ll need to get sassy and stitch the remaining Front panels together below the zipper.. easier than it sounds (just reinforce the part where the seam stops and zipper starts). Then machine or hand stitch the bottom of the pocket lining together, but leave the top open for attaching the head and final stuffing adjustments.
BODY – Machine stitch the Back panels together, then the Front assembly to the Back along each side, then shoulders, then the.. er, crotch. *blush* I also added a body weight to even out the fat headedness.. just tie a few scoops of rice into a scrap piece of liner, then place it into the bum area before stuffing.
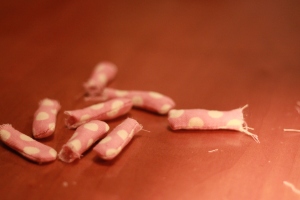
FINGERS – ugh. If you were complaining earlier about cutting out all those fingers, here’s where you’ll really start hating this project. Stitch ALL EIGHT of those stupid #$%U@$% digits into tiny WAY-hard-to-turn-right-side-out sausages. I changed the pattern because the tapered version was too painful, and they’re still painful, but super cute:) stuff ’em lightly when you’re done (pencil makes a great a tool).
ARMS – Pin three fingers and one thumb around the hand area on one Arm panel (they should point in, toward the palm, raw edges together. had to do this a few times to get the placement I wanted) Then sandwich with the other Arm panel. Stitch the whole mess, then invert. I removed the stitching and started over a few times, but it’s worth tweaking. Found it’s easier to stop after stitching over the fingers/thumb to check placement before completing the seam. Stuff when you’re happy or just done trying.
LEGS – Machine stitch the two layers, then pin the foot circle to the wider end and stitch (again, painful). Stuff ’em good.
NOW you’re not nearly finished;)
FACE – Stuff the head lightly, then decide where you want the eyes (they’re crazy far apart, let me tell you). Use the embroidery thread with a blunt craft needle to attach the buttons, then create the quilting FX by gathering lots of the poly filler between the eyes and pulling the thread snug, then tie off (had to fight and pull more and add stuffing, etc). Then for the mouth, make a few long, simple stitches to create a basic smile shape (using the same quilting trick between stitches), then pulled it all fairly snug and tie off. Carefully hand stitched the felt smile over the mouth stitches.
The face is slow but fun to play around with. keep printed images close so you can glance and squish.
When the head is finished, hand stitch all the pieces onto the torso, starting with the legs, then arms, then head. I went around each piece twice to make certain they wouldn’t pop off. Then POOF! done. er, except that the neck looked way long, so I went back and pulled it in and stitched again. still too long, IMO. needs attention. Plus, I plan to add decorative yarn stitching to make them more Sackish.
Other than those few hundred caveats, that’s the ball o’ wax. It’s nowheres close to perfect, but if you need to whip up a Sackboy stat, here’s a jump-start.
good luck!


 Anthropologie
 Banana
 Bare Necessities
 Mod
Mod